In this post I will explain how to build health apps that use Continua Health Alliance certified health devices with NodeJS. To communicate with these devices I am using the D-Bus health service from the open source Antidote IEEE 11073 stack library. Signove, the authors of the Antidote library, did excellent work creating an open source software stack that can be used to develop health applications. They provided good developer documentation (PDF) that helped me a lot to get things working.
Please note that the IEEE 11073 specificationis not an open specification. You can purchase the specification at IEEE. Without this information it is difficult to build an application since all of the device and attribute definitions are defined in this specification. Searching the web may, or may not, help you to get along without the specifications…
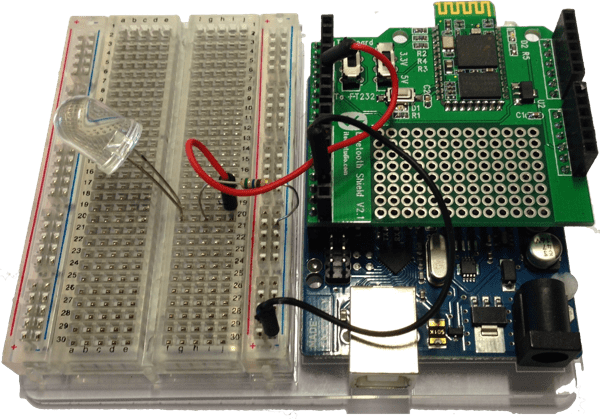
Setup
Roughly my setup breaks down into 3 components:

The Antidote Health Service handles all communications with the health devices. I’ve only managed to get Antidote running on Linux but it supports more platforms, please refer to their documentation for more info on this.
My health application itself is written for NodeJS and uses node-dbus to communicate with the Antidote Health Service. There are a couple of D-Bus modules available for NodeJS but node-bus was the only one that worked for me. I did not have prior experience with D-Bus programming and not all of the examples included with node-dbus made sense to me. I spend quite some time figuring out how to communicate with the Health Service via D-Bus. The python example, included in the Antidote software helped me out quite a lot.
As for the health device: I tested my setup using a Continua Certified Omron body composition monitor(or, as you prefer: a weighing scale…).
Tying it together
To be able to use the health service, an object should be registered on the dbus that will listen to messages of the health service. The code fragments below show how this can be done.
First, require the dependencies and make some definitions.
var dbus = require("dbus");
var xpath = require('xpath');
var dom = require('xmldom').DOMParser;

// data type of a body weight scale device
var BODY_WEIGHT_SCALE = 0x100f;

// metric id for body mass measurement
var MDC_MASS_BODY_ACTUAL = 57664;
As I mentioned above node-dbus is used to communicate with the Health Service. The xpath and xmldom modules are used to parse the information that is received from the weighing scale. The weighing scale’s data type is defined by an integer defined in BODY_WEIGHT_SCALE. The information from a measurement event is received in an XML document. Within the XML document the body mass (weight) is identified by the value of MDC_MASS_BODY_ACTUAL.
The following code fragment shows how to start using the dbus and configure dbus for using it with the health service.
dbus.start(function() {
  var bus = dbus.system_bus();
  var manager;

  try {
    manager = dbus.get_interface(
      bus,
      "com.signove.health",
      "/com/signove/health",
      "com.signove.health.manager"
    );
  } catch (err) {
    console.log('Is the healthd process running?');
    process.exit(1);
  }
When the reference to the manager interface of the health manager is made, the health application can register itself as a listener to the health service. The code below shows how this is done.
First we get a reference to the dbus registration mechanism and request a name on the dbus, in this case the name is org.servicelab.healthapp. Then a name is created for the object we are going to register, to make the name unique the process id of the currently running process is used.
Then the methods that will be listened to are defined in the Methods object. All messages that are received from the health service will generate callbacks to functions that are defined in this object. An example of the Methods object will be given below.
The Methods object is registered at the dbus using the objectName. The Methods object will implement the com.signove.health.agent interface.
  var register = new dbus.DBusRegister(dbus, bus);
  dbus.requestName(bus, 'org.servicelab.healthapp');
  var objectName = '/org/servicelab/healthapp/' + process.pid;

  var Methods = { // ... };

  register.addMethods(
    objectName,
    'com.signove.health.agent',
    Methods
  );

  manager.ConfigurePassive(objectName, [BODY_WEIGHT_SCALE]);
This concludes the registration of the listener. Only the Methods object needs to be implemented to get things working. The interface of this object is documented in Antidote’s documentation. Not all methods are implemented and the Continua device that I used did not support all features either. The code example below shows how to the device attributes of the device that is connecting and how to get the measured weight from the measurement data.
var Methods = {
  Connected: function(device, address) { },
  Associated: function (device, xmldata) {
    device = dbus.get_interface(
      bus,
      'com.signove.health',
      device,
      'com.signove.health.device'
    );
    device.RequestDeviceAttributes();
  },
  MeasurementData: function(device, xmldata) {
    var doc = new dom().parseFromString(xmldata);
    var weight = parseFloat(
      xpath.select("//meta-data[meta='" + MDC_MASS_BODY_ACTUAL + "']/../simple/value/text()", doc)
    );
    console.log('Measured weight is: ' + weight);
  },
  DeviceAttributes: function(device, xmldata) {
    console.log(xmldata);
  },
  Disassociated: function(device) { },
  Disconnected: function(device) { },
  PMStoreData: function(device, handle, xmldata) { },
  SegmentInfo: function (device, handle, xmldata) { },
  SegmentDataResponse: function(device, handle, segment, response) { },
  SegmentData: function(device, handle, segment, xmldata) { },
  SegmentCleared: function(device, handle, segment, xmldata) { }
};
When the device becomes associated with the health service the Associated function gets called. Within this function the device can be queried for its attributes. The device will answer this request using the DeviceAttributes functions. The device attributes are passed to this function as an XML document.
Measurement data will be delivered to the application via the MeasurementData function. The measurement data is in XML format. In the above example is shown how to get the weight from a measurement using an XPath query.
Gist
The source code is also available as gist.
This configuration is used in a demonstrator of the Figaro project which demonstrates how IP-based and non-IP based home networks can be converged (PDF). This demonstrator is shown in the IEEE booth on the CES coming January.